ADA Compliance Checklist for Perry Properties
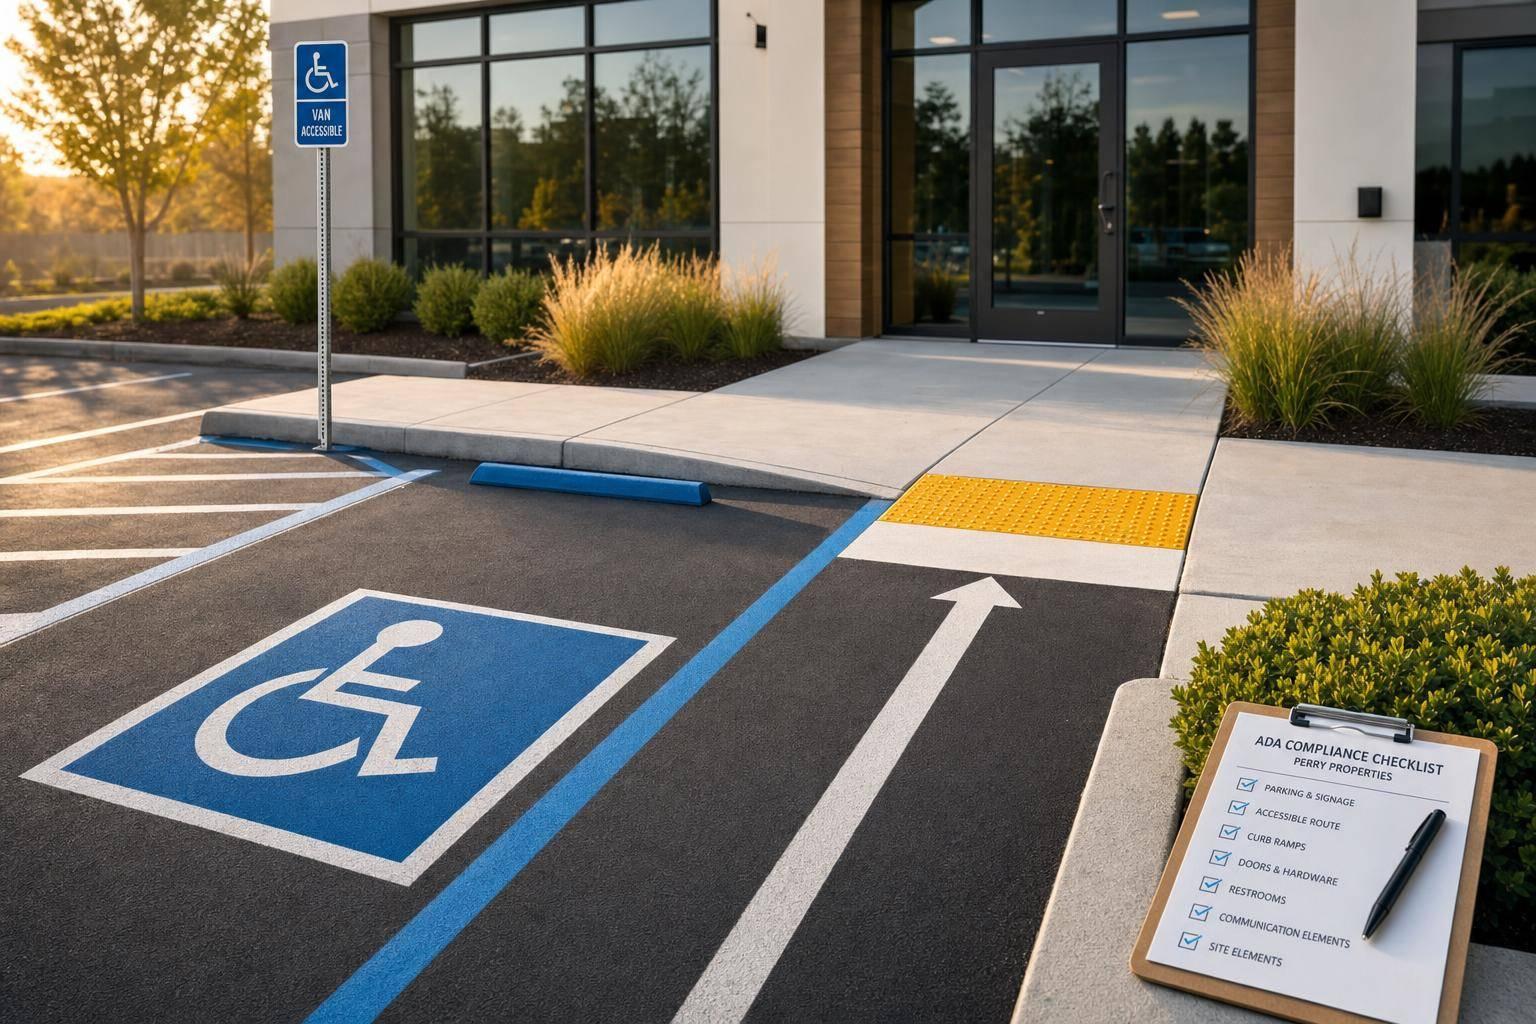
Most ADA site-access problems show up before a visitor reaches the door. This article makes that clear: parking, striping, signs, sidewalks, curb ramps, and the path to the entrance can all trigger problems, and parking lot issues are tied to more than 70% of ADA lawsuits.
If I own or manage property in Perry, the main takeaway is simple: I should inspect the whole site, not just the building interior. I would focus first on the parking area, then check signs and markings, then walk the route to the entrance, and finally log repairs with photos and dates. That matters even for older properties, because barrier removal may still be required when it can be done without major difficulty or expense.
Here’s the short version of what this checklist covers:
- Accessible parking count for each lot or garage
- Space layout and whether stalls, aisles, and routes meet the listed measurements
- Visible striping and signs, including van signs
- Clear access routes from parking to the entrance
- Curb ramps with the right placement and surface condition
- Pavement defects like trip hazards, slope issues, and broken surfaces
- Records and reinspection after repairs or lot work
A few facts stand out:
- Private ADA lawsuits can lead to attorney fees from $50,000 to $200,000
- Parking spaces and access aisles must stay at or below 2.08% slope
- Accessible routes should keep at least 36 inches of clear width
- Curb ramps can become a problem if cracks, ponding, or level changes over 1/4 inch show up
In short, this is a field checklist for site walks. I’d use it to spot issues early, fix the items that affect access first, and keep records that show the property is being checked and maintained.
Accessible Parking Checklist: Space Count, Layout, and Dimensions
ADA Parking Space Requirements: Car vs. Van-Accessible Dimensions
Verify Required Accessible and Van-Accessible Spaces Per Lot
Count ADA spaces separately for each lot or garage.
Use this table to check whether each lot has the right number of accessible spaces:
| Total Spaces in Lot | Minimum Accessible Spaces | Minimum Van-Accessible Spaces |
|---|---|---|
| 1 to 25 | 1 | 1 |
| 26 to 50 | 2 | 1 |
| 51 to 75 | 3 | 1 |
| 76 to 100 | 4 | 1 |
| 101 to 150 | 5 | 1 |
| 151 to 200 | 6 | 1 |
| 201 to 300 | 7 | 2 |
| 301 to 400 | 8 | 2 |
| 401 to 500 | 9 | 2 |
| 501 to 1,000 | 2% of total | 1/6 of accessible spaces |
| 1,001 and over | 20 + 1 per 100 over 1,000 | 1/6 of accessible spaces |
Accessible spaces should be placed on the shortest accessible route to an accessible entrance.
For lots with 4 or fewer spaces, the required accessible space must be van-accessible. Signage is not required in that case, but the width, slope, and clearance rules still apply.
After you confirm the count, move on to the size and layout of each space.
Measure Stall Width, Access Aisle Width, and Slope
Use a tape measure and slope meter during every inspection.
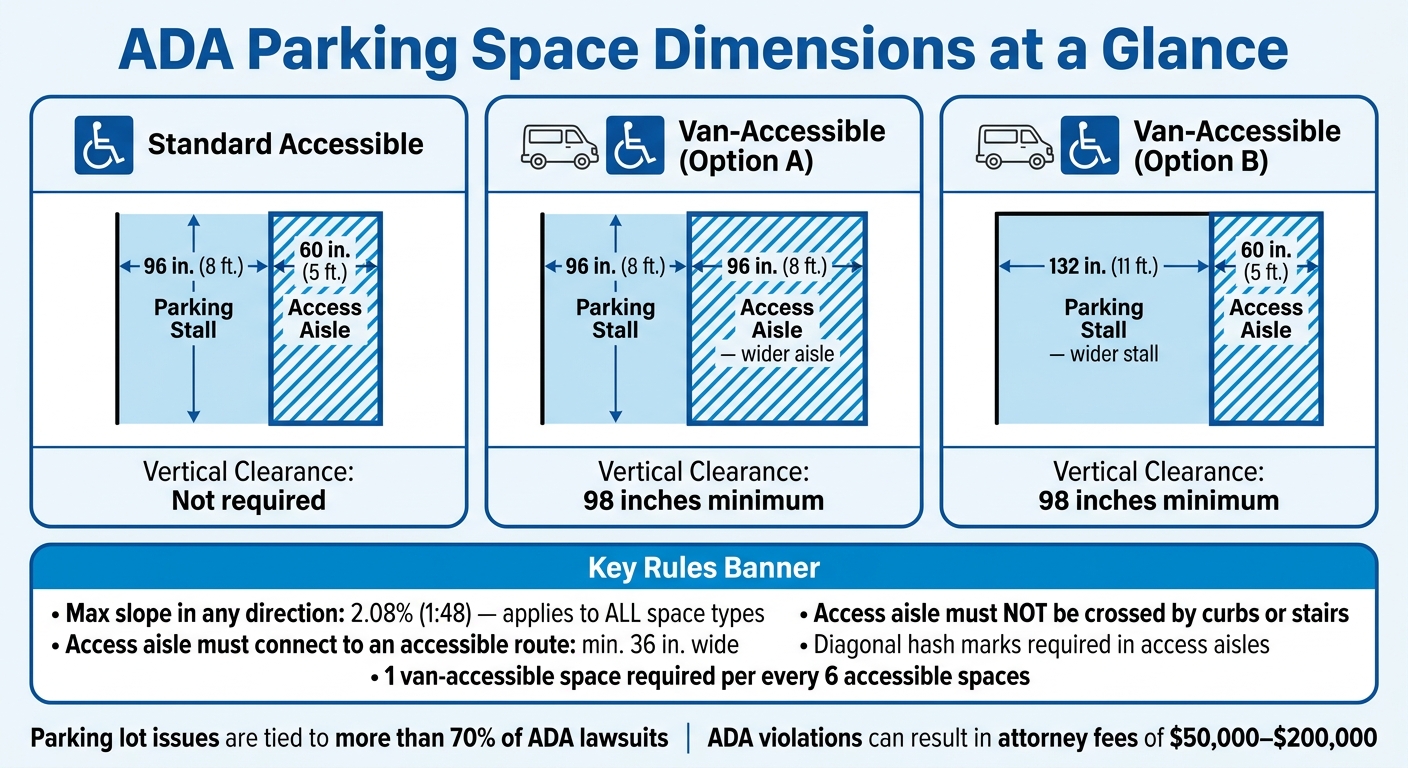
Neither the parking space nor the access aisle can exceed 2.08% (1:48) slope in any direction. That includes both running slope and cross slope.
The access aisle also needs to connect straight to an accessible route that is at least 36 inches wide and leads to the entrance without crossing curbs or stairs. If that route runs in front of the parking spaces, wheel stops should be installed so parked vehicles do not cut the clear route width below 36 inches.
This is where a lot of sites get tripped up. The number of spaces may be right, but the layout can still fall short if the stall, aisle, or route is too narrow or too steep.
Car vs. Van Space Comparison Table
| Feature | Standard Accessible (Car) | Van-Accessible (Option A) | Van-Accessible (Option B) |
|---|---|---|---|
| Min. Space Width | 96 in. (8 ft.) | 96 in. (8 ft.) | 132 in. (11 ft.) |
| Min. Aisle Width | 60 in. (5 ft.) | 96 in. (8 ft.) | 60 in. (5 ft.) |
| Min. Vertical Clearance | N/A | 98 inches | 98 inches |
Van-accessible spaces need a minimum vertical clearance of 98 inches along the driving route to and from the space.
Once the dimensions check out, review the striping and ADA compliance signs next.
sbb-itb-bfcbd36
Striping and Signage Checklist: Markings That Must Stay Visible
Inspect Accessible Symbols and Access Aisle Striping
Once you've checked space count and dimensions, look at the markings that make each space easy to spot and enforce. Every accessible space must have the International Symbol of Accessibility (ISA) on the pavement and a permanent sign. If the symbol is faded, chipped, or hard to read, restripe it and replace the sign.
Access aisles also need diagonal hash marks so drivers don't park in that striped area. Federal law does not set a required color, but blue and white are common because they stand out well against pavement. If the striping looks dull, patchy, or tough to see in daylight, it may be time to restripe.
In many cases, commercial lots need restriping every 18 to 24 months. Heavy traffic and weather can wear markings down sooner.
If the markings have been worn down, covered, or changed, check them again after any parking lot work. An asphalt overlay, mill-and-overlay, or lot layout change should trigger a full ADA striping review in the affected area.
Confirm Mounted Signs and Van Designation
Then check the signs themselves. Pavement markings by themselves are not enough. Every accessible space, except in lots with 4 or fewer total spaces, also needs a permanently mounted sign with the ISA.
The bottom edge of each sign must be at least 60 inches above the finish surface so it stays visible when a vehicle is parked there. If the sign sits within a pedestrian circulation path, the minimum height is 80 inches. Use a tape measure on every site walk. Don't guess.
Make sure the van designation is in place, easy to read, and not blocked by landscaping, pallets, snow, or anything else. If something is in the way, clear it or replace the sign right away.
| Signage Element | Requirement |
|---|---|
| ISA Sign | Required at every accessible space, except in lots with 4 or fewer total spaces |
| Van Designation | Required for 1 out of every 6 accessible spaces |
| Minimum Sign Height | 60 inches to the bottom of the sign |
| Pedestrian Path Height | 80 inches if located within a pedestrian circulation path |
| Visibility | Must remain visible when a vehicle is parked in the space |
Log each inspection with photos and dates so you have a record of compliance.
Accessible Route Checklist: Sidewalks, Curb Ramps, and Obstructions
Walk the Route from Parking to the Entrance
After you check parking spaces, striping, and signage, look at the path people actually use to get to the door.
A parking area can still fail compliance if the route to the entrance is blocked, broken, or hard to use. The path from the access aisle to the entrance must be continuous and unobstructed.
Walk the full route on foot. That matters because many route problems don’t show up from a distance. Keep 36 inches of clear width, add 60 × 60 inch passing spaces on long narrow routes, and remove obstructions like planters, bollards, signs, landscaping, wheel stops, utility covers, and pavement gaps. Also check for objects mounted 27 to 80 inches above the ground that stick out more than 4 inches into the path. That is also a violation.
Use a digital meter to measure running slope and cross slope. The route should not exceed 1:20 (5%) running slope, and cross slope must stay at or below 1:48 (2.08%). Inspect the route at least quarterly and again after any pavement work or major weather event.
Next, check each curb ramp anywhere the route crosses a curb.
Check Curb Ramp Placement, Slope, and Surface Condition
Where a walkway meets a curb, install a curb ramp. The ramp must sit on the shortest accessible route to the entrance and must not extend into a parking space or access aisle.
Check the ramp’s slope, width, landing size, side flares, detectable warnings, and surface condition. The maximum running slope is 8.33% (1:12), cross slope must stay at or below 2.08% (1:48), minimum ramp width is 36 inches, the landing must be at least 36 inches long, and side flares cannot exceed 10%. Verify that detectable warning panels are installed at the bottom of each ramp.
Look closely at the surface. Cracked concrete, settled panels, uneven transitions at ramp edges, ponding, and any level change over 1/4 inch can all create problems and may need repair.
| Curb Ramp Element | ADA Requirement |
|---|---|
| Maximum Running Slope | 8.33% (1:12) |
| Maximum Cross Slope | 2.08% (1:48) |
| Minimum Ramp Width | 36 inches |
| Landing Length | 36 inches minimum |
| Maximum Side Flare Slope | 10% (1:10) |
| Detectable Warnings | Required (truncated domes) |
| Maximum Level Change | 1/4 inch |
If an asphalt overlay or reconstruction changes the driving surface, treat that work as an alteration. Then review the curb ramps and the accessible route under the current 2010 ADA Standards.
Pavement Condition and Repair Priorities for Perry Properties
Identify Surface Defects That Create Access or Liability Risks
Not every pavement defect affects ADA access. But the ones that do should move to the top of your repair list.
After you check parking, striping, and access routes, look closely at the pavement itself. Even small surface problems can interrupt access.
Focus first on defects that block travel or create trip hazards. Slope problems can be harder to spot than cracks or broken edges, but they can still make a space noncompliant.
Document, Prioritize, Repair, and Reinspect
Once the site is documented, move findings into repairs in this order:
- Trip hazards over 1/4 inch
- Slope violations in stalls and aisles
- Broken curb ramps
- Missing or damaged signs
- Faded striping
Photograph each defect with a tape measure in view. Log the location and date. Then complete repairs in priority order, and reinspect and remeasure after surface work.
Keep seven years of inspection, repair, and photo records to show a consistent compliance effort.
FAQs
How do I know which ADA issues to fix first?
Start with high-risk violations that most often lead to lawsuits or failed inspections. Focus first on damaged curb ramps, excessive slopes, and trip hazards like concrete uplifts over 1/4 inch.
Then move to visible access issues that are easy to spot but still matter: faded parking striping, missing or poorly mounted signage, and obstructions in access aisles.
A simple check can help here. Use a level or digital slope meter to confirm accessible routes and parking spaces stay within the 2% maximum slope.
Do older properties still have to meet ADA site access rules?
Yes. The ADA applies to parking lots that serve places of public accommodation or commercial facilities, and older properties are not exempt.
If an older site has inherited limits, the owner should still review the lot for layout changes or surface repairs that may be needed. Regular maintenance and planned upgrades can help cut liability and support safe, day-to-day access.
How often should I inspect parking lots and access routes?
Inspect parking lots and access routes every month, and do a more detailed review at least every quarter. Complete a full accessibility audit once a year.
You should also inspect the site after any resurfacing or construction work. That helps confirm the area still meets the 2010 ADA Standards for Accessible Design. Keep photos and records of any corrective actions.
Need parking lot maintenance?
Contact us today for a free proposal on your next pavement project.
Get Your Free Proposal